
A crown remake adds a new appointment, another injection, another temporary, another lab cycle, and a patient who expected the case to be finished. In a busy restorative schedule, even one remake can disrupt the afternoon.
From the lab bench, the causes are usually familiar: problems with margins, scans, bite records, reduction, contacts, shade, or missing instructions.
At Palm Beach Dental Lab, many remake conversations start with relatively small problems, such as a hidden margin, an unstable bite, a missing shade photo, or a prescription that leaves too much to interpretation.
A 2026 multicenter audit of 40,344 fixed prosthodontic restorations reported a 6.9% remake prevalence for crowns. The leading remake reasons were margin-fit discrepancy, proximal-fit issues, and improper fit.1
Many of the problems that lead to crown remakes arise before the restoration is designed, when incomplete information leaves the technician to make a judgment about the case.
Here are seven areas to check before the case leaves the operatory.
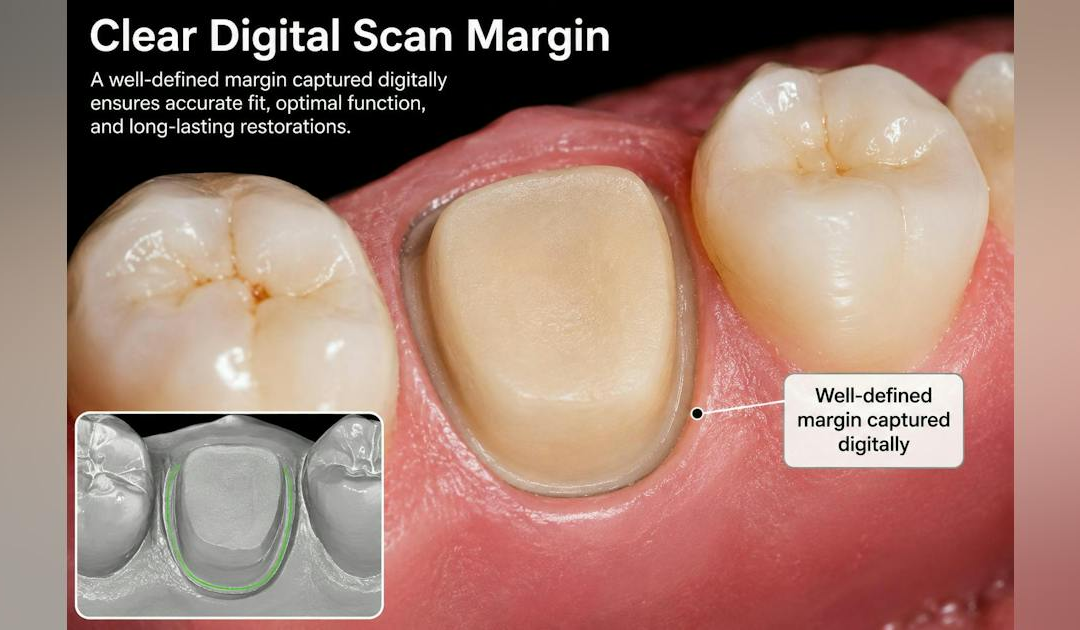
A crown is at risk when the lab cannot clearly read the finish line. Blood, saliva, tissue, scan noise, drag, voids, and rough preparation edges can all hide the margin. Once that happens, the technician has two choices: stop and ask for clarification or make a judgment call. The latter can contribute to an open margin, short margin, overextension, or a crown that requires substantial chairside adjustment.
If the margin is buried under tissue or lost in a shiny, wet scan, the design is already carrying additional risk. A digital workflow helps, but the scanner can capture only what the clinician exposes and dries.
Before submitting the case, rotate the scan and inspect the margin from the occlusal, buccal, and lingual views. If the finish line disappears for even a short section, rescan that area.
If the margin takes too long to identify on the screen, it is worth reassessing the scan before sending the case.
READ MORE | What’s the best type of crown prep?
A clean scan or impression gives the lab a clean starting point, while excess noise can introduce problems before design begins. Saliva, blood, bubbles, pull marks, tray movement, missing interproximal data, or scan stitching errors can change the way the crown seats. Small errors at the capture stage can become larger problems at try-in.
Digital impressions can produce accurate restorations, and clinical research has shown strong results for intraoral scanning in crown fabrication.2,3 However, the quality of the records still depends on how they are captured.
Common scan problems include chopped distal surfaces, incomplete adjacent contacts, shiny margin areas, and missing opposing anatomy. In conventional impressions, common problems include voids, drags, thin material around the margin, and distortion during removal.
Review the scan before dismissing the patient, including the preparation, adjacent teeth, opposing arch, and bite relation. For conventional impressions, check the margin under magnification before sending the case. If the finish line is not visible in the impression, the lab will not have the information needed to reproduce it accurately.
A crown needs space for material strength, anatomy, esthetics, and occlusion. When the preparation is too tight, the lab has to fit the restoration into a space that may not support the requested result. The crown may become thin, flat, bulky, high in occlusion, or weak in a functional area.
This is common with second molars, short clinical crowns, heavy bites, and cases in which esthetics demand more translucency or layering.
Material choice also matters. Monolithic zirconia, lithium disilicate, layered zirconia, and PFM restorations do not have the same spatial requirements or design and cementation considerations.
Research on ceramic fixed prostheses has linked marginal and internal adaptation with preparation design and finish-line form.4 Adequate space is therefore important both for the restorative material and for the intended anatomy.
Before scanning, check occlusal clearance, smooth sharp internal angles, remove unsupported enamel, and tell the lab when clearance is limited.
For example, a note such as “minimal clearance on distal occlusal, keep zirconia monolithic” gives the technician specific direction when designing the restoration.